Making your own beauty products at home is not only fun but gives you control over the ingredients you use. From face masks to hair treatments, whipping up these 10 DIY beauty products is a breeze. Plus, you can customize them to suit your skin type and preferences. Get ready to pamper yourself with simple recipes that prove looking good doesn’t have to be complicated!
Homemade Lavender Bath Salts

Making your own lavender bath salts is a fun and easy way to treat yourself at home. The image shows a lovely jar filled with white salt and beautiful purple lavender blossoms. This combination not only looks pretty but also smells amazing!
To create your own batch, you’ll need a few simple ingredients. Start with one cup of Epsom salt, half a cup of sea salt, and a few drops of lavender essential oil. Mix these together in a bowl. Then, gently stir in some dried lavender flowers for added scent and a pop of color.
Once mixed, transfer your bath salts into a clean jar. You can use a fun label or decorate the jar to make it special. When you’re ready for a relaxing bath, just add a few scoops of these salts to warm water. The soothing aroma of lavender will help you unwind and enjoy some peaceful moments.
Here’s how to make it:
Ingredients:
- 2 cups Epsom salt
- 1 cup sea salt (or Himalayan pink salt)
- 1/2 cup baking soda
- 15-20 drops lavender essential oil
- Dried lavender flowers (optional, for decoration)
Instructions:
- Mix the salts: In a large bowl, combine the Epsom salt, sea salt, and baking soda. Stir well to ensure they are evenly mixed.
- Add lavender essential oil: Drop the lavender essential oil into the salt mixture and stir again. You can adjust the number of drops depending on how strong you want the scent.
- Optional – Add dried lavender flowers: For a pretty touch, mix in a small handful of dried lavender flowers. This step is optional but adds a lovely aesthetic to the bath salts.
- Store: Transfer the bath salts into a glass jar or an airtight container. Store in a cool, dry place.
To Use:
- Add about 1/4 to 1/2 cup of bath salts to your warm bath water, and relax as the lavender helps soothe your muscles and calm your mind.
Nourishing Aloe Vera Face Mask

This image showcases a delightful aloe vera face mask, a perfect DIY beauty product for your skincare routine. The creamy green mask sits in a white bowl, topped with fresh aloe vera leaves. These leaves not only add to the beauty of the presentation but also highlight the natural ingredients used.
Aloe vera is known for its soothing and hydrating properties, making it ideal for a nourishing face mask. To create this mask at home, you’ll need just a few simple ingredients.
Start with fresh aloe vera gel, which you can scoop directly from the leaf. Blend it with a tablespoon of honey and a few drops of lemon juice for added brightness. Mix until smooth, then apply it to your face using a brush, like the ones shown in the image. Leave it on for about 15-20 minutes and rinse with warm water for glowing skin!
Here’s how to make it:
Ingredients:
- 2 tablespoons fresh aloe vera gel (or store-bought, pure aloe vera gel)
- 1 tablespoon honey (preferably raw or organic)
- 1 tablespoon plain yogurt (or Greek yogurt)
- 1 teaspoon turmeric powder (optional, for glowing skin)
Instructions:
- Prepare aloe vera gel: If using fresh aloe vera, cut a leaf from the plant, slice it open, and scoop out the gel. If using store-bought aloe vera gel, make sure it’s 100% pure with no added chemicals.
- Mix ingredients: In a small bowl, combine the aloe vera gel, honey, yogurt, and turmeric powder (if using). Stir until you have a smooth and well-mixed paste.
- Apply to your face: Cleanse your face and gently apply the mask evenly over your skin, avoiding the eye area.
- Let it sit: Leave the mask on for about 10-15 minutes, allowing the ingredients to nourish and hydrate your skin.
- Rinse off: After 10-15 minutes, rinse off the mask with warm water and pat your face dry with a clean towel.
Tips:
- For extra hydration, you can add a few drops of rose water to the mix.
- If you have sensitive skin, do a patch test before applying the mask to your face.
Refreshing Cucumber Eye Gel

The Refreshing Cucumber Eye Gel is a fantastic DIY beauty product that can brighten and soothe tired eyes. This gel is perfect for those long days when you need a little pick-me-up.
In the image, you can see a lovely jar labeled ‘Cucumber Eye Gel’ surrounded by fresh cucumber slices. The coolness of cucumber helps reduce puffiness and dark circles, making it an ideal ingredient for eye care.
Making this gel at home is simple. You’ll need fresh cucumber, aloe vera gel, and a little bit of essential oil for fragrance. Start by blending half a cucumber until smooth. Strain the mixture to get the juice, and then mix it with aloe vera gel. A few drops of your favorite essential oil can add a pleasant scent.
Once mixed, pour the gel into a clean jar and store it in the fridge. Apply it under your eyes with your fingertips in the morning or before bed for a refreshing boost!
Here’s how to make it:
Ingredients:
- 1/2 cucumber (peeled and chopped)
- 1 tablespoon aloe vera gel (pure)
- 1 teaspoon rose water (optional, for added soothing effect)
- A small container or jar for storage
Instructions:
- Prepare the cucumber: Peel the cucumber and chop it into small pieces. Blend it in a blender or food processor until smooth.
- Strain the juice: Use a fine mesh strainer or cheesecloth to strain the cucumber puree into a clean bowl, extracting the juice.
- Mix the ingredients: In a separate bowl, combine the cucumber juice with the aloe vera gel and, if using, the rose water. Stir everything together until well combined.
- Store the gel: Pour the mixture into a small container or jar and store it in the refrigerator for up to a week.
To Use:
- Gently apply a small amount of the cucumber eye gel under your eyes, avoiding direct contact with the eyes.
- Leave it on for about 10-15 minutes to refresh and hydrate the skin around your eyes.
- Rinse off with cool water afterward.
Revitalizing Coffee Sugar Scrub
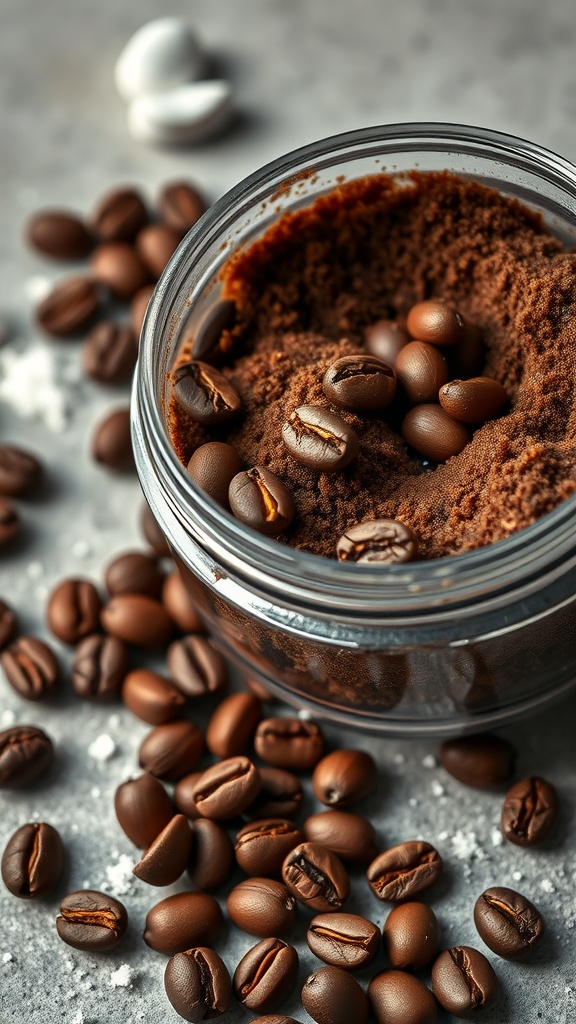
The revitalizing coffee sugar scrub is a fantastic DIY beauty product that can transform your skincare routine. This image captures the essence of this scrub, showcasing a jar filled with rich coffee grounds and whole coffee beans that hint at its invigorating properties.
Using coffee in your scrub not only provides a lovely aroma but also helps to exfoliate dead skin cells. The sugar acts as a gentle abrasive, making your skin feel smooth and refreshed. Plus, coffee is known for its stimulating effects, which can help improve circulation, giving your skin a healthy glow.
Here’s how to make it:
Ingredients:
- 1/2 cup ground coffee (freshly brewed or used coffee grounds)
- 1/4 cup sugar (white or brown sugar)
- 2 tablespoons coconut oil (or olive oil)
- 1 teaspoon vanilla extract (optional, for a lovely scent)
Instructions:
- Combine the dry ingredients: In a small bowl, mix the ground coffee and sugar together.
- Add the oil: Stir in the coconut oil (or olive oil) until the mixture has a thick, paste-like consistency. If you’d like a more liquid scrub, you can add a bit more oil.
- Add vanilla (optional): If you want a nice scent, stir in the vanilla extract.
- Store the scrub: Transfer the scrub into an airtight jar or container. It can be stored for up to 2 weeks in a cool, dry place.
To Use:
Rinse off with warm water to reveal smooth, exfoliated skin.
In the shower, apply the scrub to damp skin and gently massage it in circular motions, focusing on areas like your arms, legs, or even your face (be cautious around the eye area).
Moisturizing Coconut Oil Body Scrub
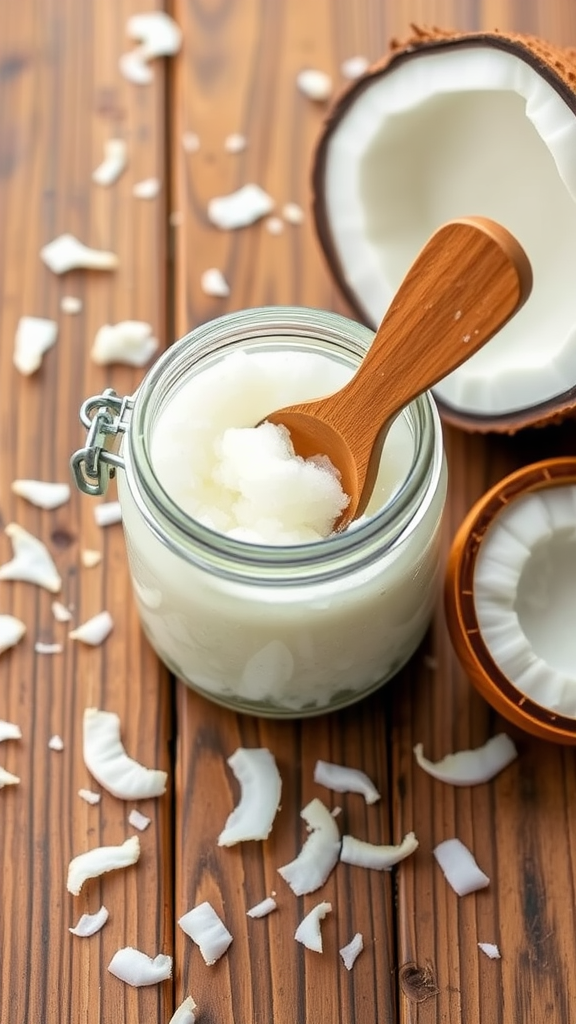
The image showcases a jar of coconut oil, accompanied by some shredded coconut and a wooden spoon. This inviting scene sets the mood for creating a delightful moisturizing coconut oil body scrub right at home.
This DIY scrub is not just easy to make, but it also offers amazing benefits for your skin. Coconut oil is known for its moisturizing properties, while the scrub helps to exfoliate and remove dead skin cells.
Here’s how to make it:
Ingredients:
- 1/2 cup coconut oil (solidified or softened)
- 1 cup sugar (white or brown sugar)
- 1 teaspoon vanilla extract (optional, for added scent)
- A few drops of your favorite essential oil (optional, for added fragrance)
Instructions:
- Melt the coconut oil: If your coconut oil is solid, gently warm it in the microwave or on the stove until it becomes a liquid. If it’s already in liquid form, you can skip this step.
- Mix the sugar and oil: In a small bowl, combine the sugar and coconut oil. Stir well until the sugar is evenly coated with the oil and the mixture is thick but spreadable.
- Add fragrance (optional): If you’d like, stir in the vanilla extract or any essential oils (like lavender, eucalyptus, or citrus) for a lovely scent.
- Store the scrub: Transfer the scrub into a jar or airtight container. Store it in a cool place. It will last for a few weeks.
To Use:
- In the shower, apply the scrub to damp skin, gently massaging it in circular motions to exfoliate and moisturize.
- Focus on rough areas like elbows, knees, and feet.
- Rinse off with warm water and pat your skin dry to reveal soft, hydrated skin.
Smoothing Avocado Hair Mask
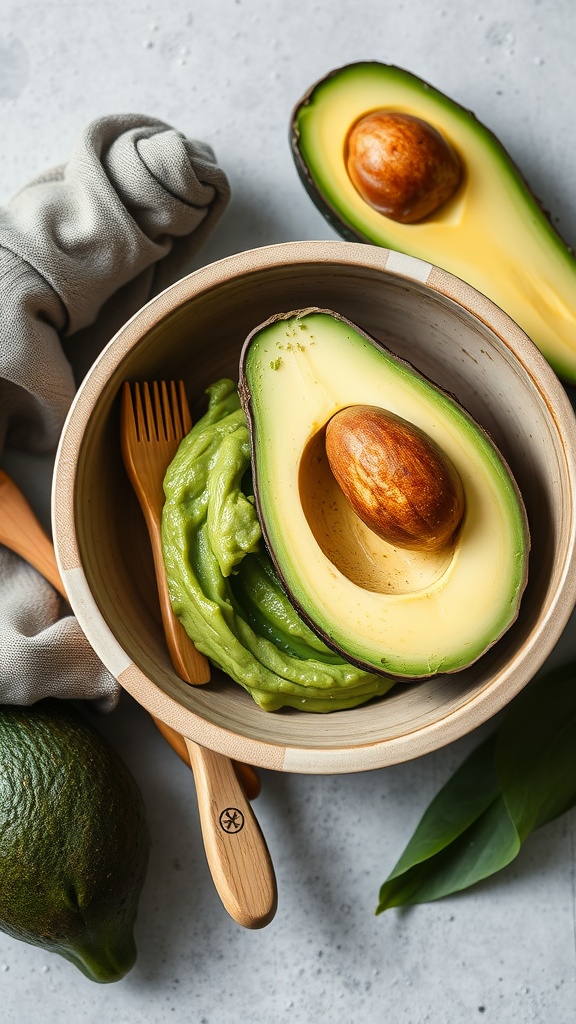
If you’re looking to pamper your hair, a smoothing avocado hair mask is the way to go. Avocado is packed with nutrients and healthy fats that can nourish your hair, leaving it soft and shiny. The image shows a fresh avocado, beautifully cut in half, with its creamy green flesh ready to be mashed. This mask is perfect for all hair types, especially if your locks are feeling a bit dry or frizzy.
This DIY hair mask not only smells great but also works wonders for your hair’s health. After using it, you’ll notice your hair feels softer and looks more vibrant. So grab that avocado and treat yourself to some hair TLC!
Here’s how to make it:
Ingredients:
- 1 ripe avocado
- 2 tablespoons olive oil (or coconut oil)
- 1 tablespoon honey
- 1 tablespoon yogurt (optional, for added moisture)
Instructions:
- Prepare the avocado: Cut the avocado in half, remove the pit, and scoop the flesh into a small bowl. Mash it until it’s smooth and creamy.
- Add the oils and honey: Add the olive oil (or coconut oil) and honey to the mashed avocado, and stir until well combined. If you’re using yogurt, add it now for extra moisture.
- Apply the mask: Apply the mixture evenly to your hair, focusing on the ends where your hair tends to be drier. If your scalp is dry, you can also massage the mask into your scalp.
- Leave it on: Cover your hair with a shower cap or plastic wrap, and leave the mask on for 20-30 minutes to let the ingredients deeply nourish your hair.
- Rinse and wash: Rinse the mask out thoroughly with warm water, then wash your hair with your regular shampoo and conditioner.
Tips:
- If you have thick or long hair, you can double the recipe.
- For extra hydration, use the mask weekly.
Healing Honey and Tea Tree Acne Treatment

If you’re dealing with pesky acne, this Healing Honey and Tea Tree Acne Treatment is a great DIY solution. In the image, you see a jar filled with golden honey, a natural moisturizer that also has antibacterial properties. The honey is accompanied by a wooden honey dipper, making it easy to dispense just the right amount for your treatment.
Tea tree oil is known for its powerful anti-inflammatory and antimicrobial qualities. When combined with honey, it creates a soothing treatment that can help reduce redness and promote healing. The green leaves in the image hint at the natural ingredients that make this blend effective.
Here’s how to make this:
Ingredients:
- 1 tablespoon raw honey (preferably organic)
- 2-3 drops tea tree essential oil
- 1 teaspoon aloe vera gel (optional, for added soothing)
Instructions:
- Mix the honey and tea tree oil: In a small bowl, combine the raw honey with the tea tree essential oil. Stir them together well.
- Add aloe vera (optional): If you’d like added soothing properties, mix in the aloe vera gel.
- Apply the treatment: Using clean fingers or a cotton swab, apply the mixture directly to the acne spots or areas of concern. Avoid applying it to your entire face unless you’d like to treat larger areas.
- Leave it on: Let the mixture sit on your skin for about 15-20 minutes. Honey is naturally antibacterial, and tea tree oil helps combat acne-causing bacteria.
- Rinse off: After 15-20 minutes, rinse the treatment off with warm water and gently pat your face dry with a clean towel.
Tips:
- You can use this treatment once or twice a day depending on how sensitive your skin is.
- Always do a patch test before applying it to your face to ensure there’s no irritation or allergic reaction.
Citrus Refreshing Body Mist

Creating your own body mist can be a fun and easy project, and this citrus refreshing body mist is a perfect place to start. The image shows a beautifully arranged setup with a spray bottle of body mist, surrounded by fresh oranges. The vibrant colors of the oranges bring a bright energy to your beauty routine.
This body mist is great for a quick pick-me-up during the day. The uplifting scent of citrus not only refreshes your skin but also lifts your mood. It’s perfect for those warm days when you want something light and revitalizing.
Spray it on your skin whenever you need a little refreshment! Storing it in the fridge can also give you an extra cool burst on hot days. So, grab your ingredients and enjoy crafting this delightful mist!
Here’s how to make this:
Ingredients:
- 1/2 cup distilled water
- 1/4 cup witch hazel (or vodka)
- 10-15 drops of essential oils (such as lemon, orange, grapefruit, or lime)
- A small spray bottle (preferably 4 oz or larger)
Instructions:
- Mix the liquids: In a bowl, combine the distilled water and witch hazel (or vodka). Witch hazel is a natural toner and helps the scent last longer, while vodka can act as a preservative.
- Add essential oils: Add 10-15 drops of your chosen citrus essential oils (such as lemon, orange, or grapefruit) to the mixture. You can adjust the number of drops based on how strong you want the scent.
- Stir well: Stir the mixture to ensure the essential oils are well combined with the water and witch hazel.
- Pour into a spray bottle: Carefully pour the mixture into a small spray bottle. If you’re using a funnel, it can help avoid spills.
- Shake before use: Since essential oils may separate from the water, always shake the bottle before each use.
To Use:
- Spray the mist on your body or clothes whenever you want a fresh, citrusy scent. It’s great for a quick pick-me-up during the day!
Tips:
- You can customize the scent by blending different citrus oils.
- Store the body mist in a cool place, and it should last for a few weeks.
Gentle Oatmeal Exfoliating Cleanser
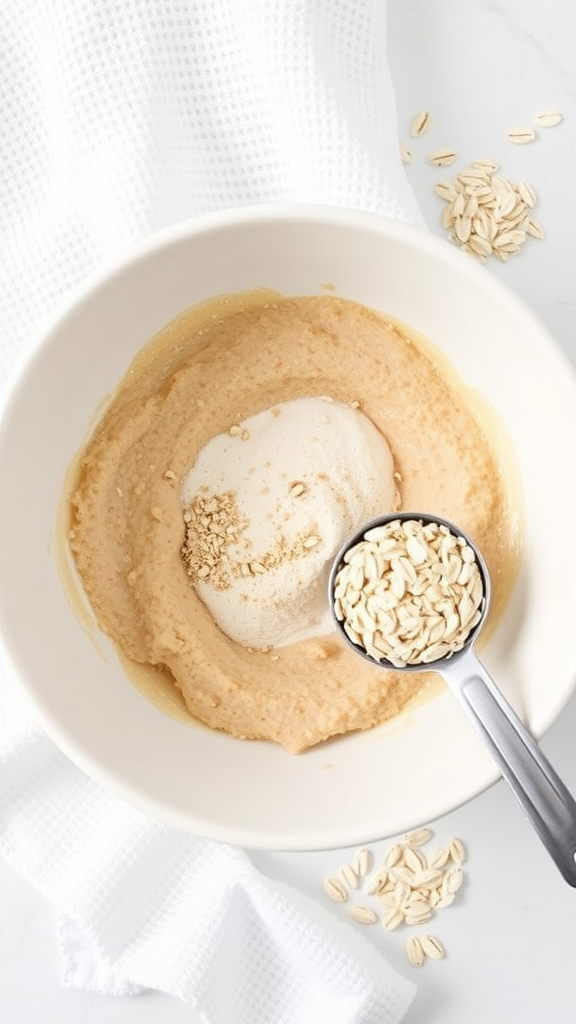
This gentle oatmeal exfoliating cleanser is a simple yet effective way to keep your skin looking fresh. The image showcases a creamy mixture in a glass bowl, surrounded by rolled oats, which are the star ingredient in this recipe.
When you’re ready to use it, apply the mixture to your damp face. Gently massage it into your skin in circular motions. Rinse with warm water, and feel the softness of your skin. This cleanser is perfect for all skin types and can be used a few times a week.
Having this easy DIY beauty product at home means you can treat your skin well without breaking the bank. Plus, it’s all-natural, which is a definite win!
Here’s how to make this:
Ingredients:
- 1/4 cup rolled oats (finely ground)
- 2 tablespoons honey
- 1 tablespoon yogurt (or milk)
- A few drops of water (if needed, to adjust consistency)
Instructions:
- Grind the oats: If you have whole rolled oats, grind them in a blender or food processor until they form a fine powder. This helps create a gentle exfoliating texture for your skin.
- Mix the ingredients: In a small bowl, combine the finely ground oats, honey, and yogurt (or milk). Stir until you get a thick, paste-like consistency. If the mixture is too thick, add a few drops of water to adjust it.
- Apply to your face: Gently massage the mixture onto your damp face using circular motions. Focus on areas that need exfoliation, such as the nose or forehead.
- Leave it on: Let the cleanser sit for 2-3 minutes to allow the oatmeal to soothe and the honey to hydrate your skin.
- Rinse off: After a few minutes, rinse your face with warm water and gently pat your face dry with a clean towel.
Tips:
- This cleanser is gentle enough to use a few times a week, but if you have sensitive skin, you can reduce the frequency.
- For an extra soothing effect, you can refrigerate the mixture for a cool, refreshing sensation.
Soothing Almond Oil Lip Balm

Making your own lip balm is fun and easy! This soothing almond oil lip balm is perfect for keeping your lips soft and hydrated. The image shows a small tin of lip balm surrounded by whole almond nuts. The rich, creamy texture of the balm is inviting and promises to deliver comfort to dry lips.
To create this lovely lip balm, you will need just a few simple ingredients. Grab some almond oil, beeswax, and a bit of shea butter. The almond oil adds moisture, while the beeswax helps to seal it in. The shea butter provides a rich, buttery feel to the balm.
Here’s how to make it:
Ingredients:
- 2 tablespoons almond oil
- 1 tablespoon beeswax
- 1 tablespoon shea butter
Instructions:
- In a small saucepan, melt the beeswax and shea butter over low heat.
- Once melted, remove from heat and stir in the almond oil.
- Pour the mixture into a small tin and let it cool. Your lip balm is ready to use!
This lip balm makes a great gift too. Just package it nicely, and you’re all set! Enjoy smooth, kissable lips while knowing it’s made with love.
In conclusion, making your own beauty products at home is a fun and rewarding way to treat your skin with natural, nourishing ingredients.
Whether you’re creating a soothing face mask, refreshing body mist, or hydrating lip balm, these easy DIY recipes offer an affordable and customizable way to pamper yourself.
By using simple ingredients, you can avoid harsh chemicals while enjoying the benefits of healthier, glowing skin. So why not give these 10 easy DIY beauty products a try and start your journey to natural self-care today? Your skin will thank you!
This post may contain affiliate links. If you make a purchase or booking through one of our links, we may earn a small commission. As an Amazon Associate, I earn from qualifying purchases.